


 Français
 Русский
 Español
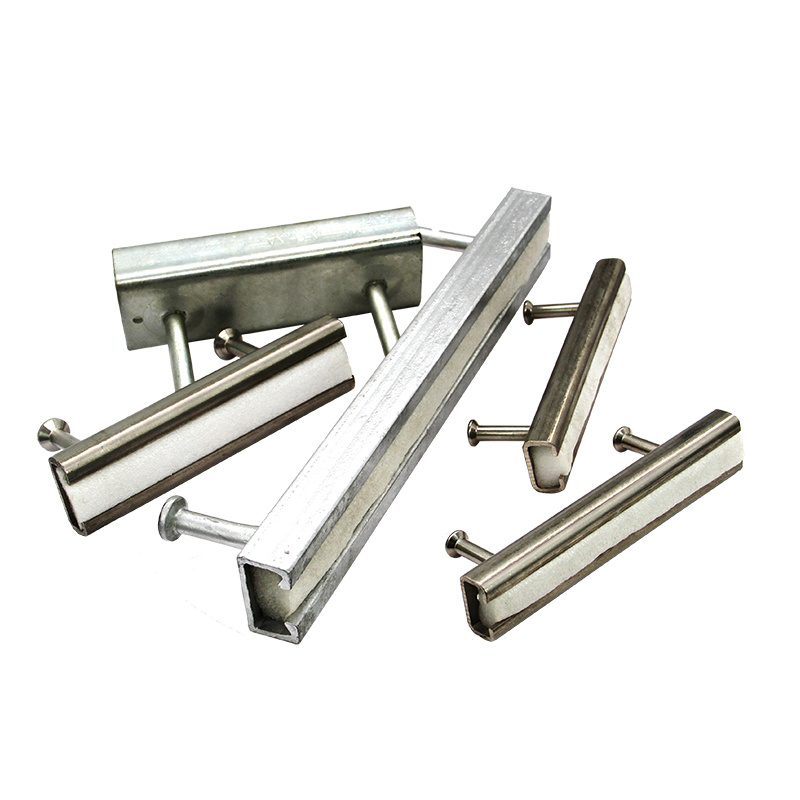
Learning how to install cast in channel is a coordination exercise as much as a fixing exercise: the slotted receiver must be in the right place, depth and orientation before concrete pours, since once it cures there is no drilling adjustment. This step-by-step guide walks contractors and foremen through preparation, fixing, inspection, pouring and T-bolt fitting on slab edges and reveals. Section selection appears in our sister guide to selecting a cast-in anchor channel; matching hardware sits in our bolts, anchors and brackets range.
Before You Begin: Drawings, Specs and Site Checks
A cast-in channel cannot be moved after the pour, so preparation carries the cost of every later error. Reconcile drawings against the as-built structure: record centre line, embed depth, finished face position and slot direction. Confirm the delivered channel matches the schedule — section size, leg pattern, length, finish and T-bolt family; a bolt from one maker may not seat in another’s lip.
- Check concrete class, cover requirement and pour sequence, and note the channel’s position relative to existing rebar.
- Verify embed length and leg projection against the supplier’s manual; never substitute a shorter section on site.
- Confirm the slot opens toward the finished facade surface; keep the supplier’s torque values and T-bolt schedule on site.
Step 1 — Mark Out and Verify Positions
Transfer the centre line from the drawing onto the formwork or cage, from a controlled benchmark. Mark both ends and any joint position, and check the line clears obstacles — rebar, conduits and service pipes — before fixing; a channel forced past steel rarely ends up plumb. Where several channels align, mark them from the same datum for spacing. Position, level and perpendicularity tolerances come from the specification and supplier manual.
Step 2 — Fix the Channel to Formwork or Rebar
Channels are fixed in two ways: held against the formwork so its face finishes flush after demoulding, or tied and welded to the cage in precast and deep elements at the engineered depth. Legs carry the pull-out load and must sit fully inside concrete, never flattened or trapped against a bar.
- Position the channel on the marked line, slot opening facing the finished face, legs pointing back into the concrete volume.
- Fix to formwork with approved clips, screws or backing blocks so the rail cannot float or rotate under vibration; every contact point must be secure.
- Or tie to the cage with approved wire at the manual’s support points, clear of main bars, prevented from rotating.
- Check level, plumb and orientation along the run, then verify embed depth and face position against the datum.
A channel fixed only at its ends can drift during pouring — a common cause of an out-of-line receiver.
Step 3 — Pre-Pour Inspection and Slot Protection
Before concrete arrives, run a formal pre-pour check while everything is visible; fixes after curing need demolition or an engineered alternative.
- Confirm centre line, level, plumb, embed depth and face position against the drawing; log accepted deviations against the specified tolerance.
- Insert the protective foam filler along the full slot length so paste cannot enter and harden inside the channel.
- Check fixings are tight, legs are buried, nothing protrudes into the slot, and matched T-bolts are stored dry; then sign off the record.
A blocked slot is the most common defect: once paste sets inside, the T-bolt cannot slide, so filler must be continuous with no gaps at ends.
Planning the finished facade hardware? See receivers, spiders and brackets on our curtain wall systems range, and have our team check your channel schedule before the pour.
Step 4 — Pour, Vibrate and Cure
During pouring, keep the channel under observation. Place concrete evenly around the legs, not on the slot face, and vibrate out voids behind and below it — but do not bear the vibrator on the channel, which can shift it off line or bend the legs. Follow the curing schedule before stripping formwork; do not load the receiver until concrete reaches design strength.
Step 5 — Stripping, Cleaning and T-Bolt Installation
Once formwork is removed, locate every channel, pull out the filler, and clear the slot of residue, dust and paste with a brush or compressed air; it should read straight and flush, with no sinking, rotation or exposed leg.
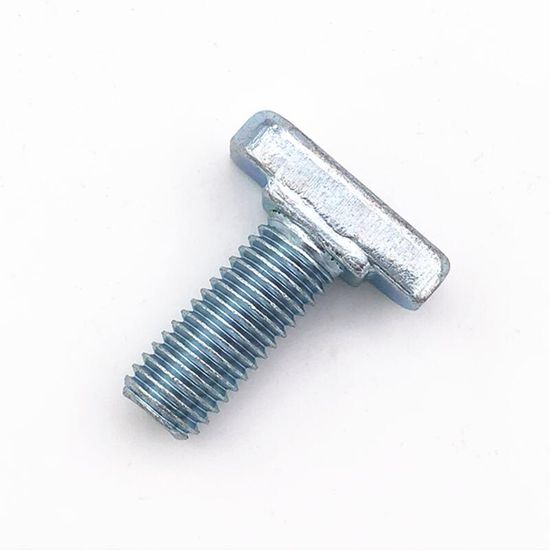
Fitting the T-bolt follows the supplier’s manual: slide the T-head into the slot from the end opening, turn it to lock behind the lip, position the fitting along the rail, then hand-tighten before final torque. Serrated channel nuts offer the same where end entry is awkward; always use the matching fitting from the same family. Final tightening uses a torque wrench at the supplier’s specified value — never estimate by feel — then the bracket or spider bolts onto the shank with the correct washer and nut.
Common Mistakes and Remediation
- Concrete blocks the slot. Cause: missing or discontinuous filler strip. Clear set paste by hand before forcing a bolt; if fully clogged, assess with the engineer rather than chipping the receiver.
- Channel drifts off line. Cause: insufficient fixings or vibration on the rail. Small shifts are partly absorbed by along-slot adjustment; where it cannot reach position, raise post-installed fixings with the engineer rather than forcing the bracket.
- Fixing fails before pour. Cause: loose clips or ties released by flowing concrete; re-secure before placing, and reposition a floated channel while concrete is workable.
- Wrong T-bolt family. Mismatched heads slip under shear; use the matched fitting from the channel supplier.
- Channel missed entirely. Where no receiver was cast in, engineers commonly specify post-installed expansion or chemical anchors; see our guide to curtain wall fixing anchors. Never mix both on one load path without review.
Safety and Quality Records
Wear standard PPE for formwork, concrete handling and cleaning; compressed air needs eye protection, and edge work follows the fall-protection plan. Record each channel: reference, position, embed depth, filler, sign-off, T-bolt type and torque value; these support inspection and later bracket traceability.
How to Install Cast-in Channels FAQ
How early should channels be fixed before the pour? Once reinforcement and formwork are final, fix, inspect and sign; never leave it unsecured where trades can knock it off line.
Can I adjust the channel after concrete cures? Limited along-slot adjustment remains via the T-bolt, but the channel cannot be repositioned; out-of-line receivers need engineering review.
What torque should I apply to the T-bolt? Use the supplier’s manual value with a calibrated wrench; figures differ by section, size and grade, so no generic number appears.
Why did concrete set inside the slot? The foam filler was usually missing, split or discontinuous; a continuous strip along the full length keeps paste out.
Which way must the slot open? Toward the finished facade so brackets and T-bolts enter after demoulding; orientation cannot be reversed after curing.
What if a channel was not cast in? Ask the engineer to size post-installed expansion or chemical anchors; do not put an unapproved fixing on the load path.
Ready to order receivers and matched T-bolts for a slab edge or reveal? Send drawings and factored loads for a channel, T-bolt and bracket schedule checked against supplier data — get a quotation from Trilonum.
